Not all solid-state drives (SSDs) are created equal. Specifically, an NVMe SSD upgrade can deliver much faster performance on a machine that’s already using a SATA SSD.
The good news is you can probably upgrade your Windows computer, especially a desktop, to an NVMe drive. The better news: NVMe drives’ prices are getting friendlier. Samsung, for example, lowered the price of its 970 series quite significantly on the release date.
And here’s the best news: you can migrate to an NVMe drive without losing data, system settings, or having to reinstall Windows. And if you’re using the same computer—namely the motherboard –there’s no need to reactivate your software, either.
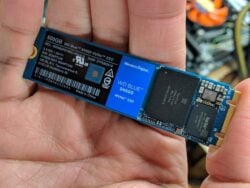
I upgraded a Windows 10 computer from a 1TB WD Blue SATA SSD to a 500GB Samsung NVMe SSD 970 Evo for this post. But you can upgrade any qualified computer (running Windows 7 or later) that currently uses any SATA drive (hard drive or SSD) to any NVMe SSD by following the same process.
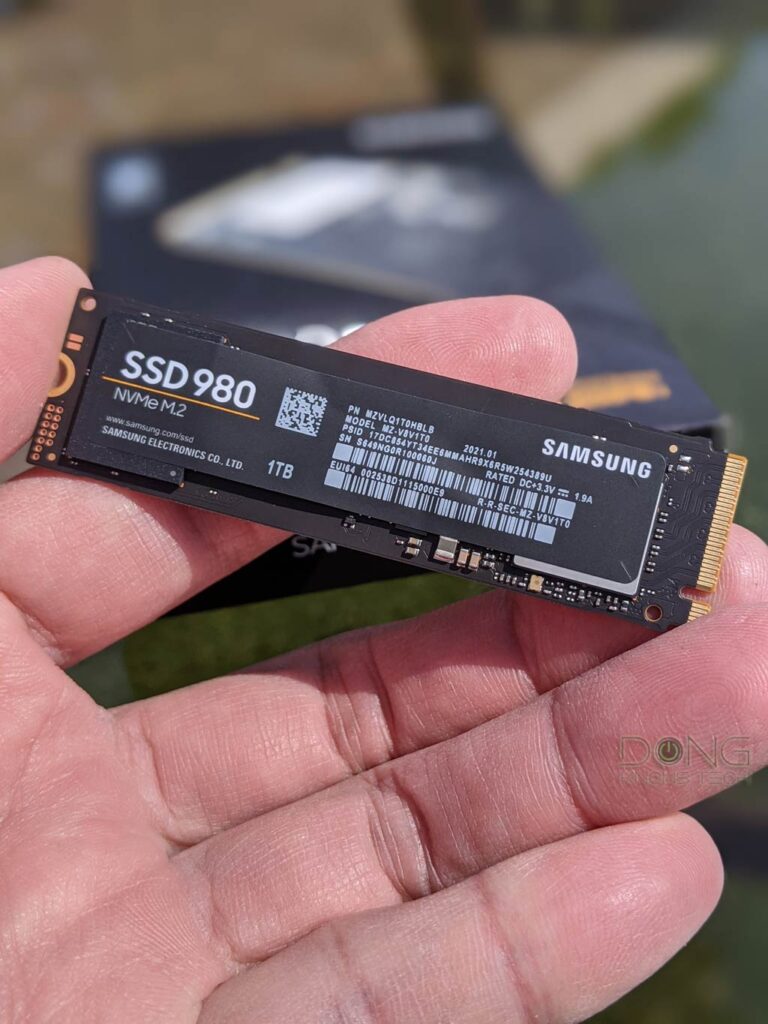
NVMe SSD Upgrade: Hardware requirements
Before you can upgrade, make sure your computer supports NVMe. That means either it has an “M key” M.2 slot or has an available x4 PCIe slot. In most cases, you can use the x8 or x16 PCIe slot for a video card (most desktop computers have at least one).
For best performance, make sure your computer supports 3rd Gen PCIe (or later). Earlier PCIe versions will likely work, but you won’t get the best performance in this case.
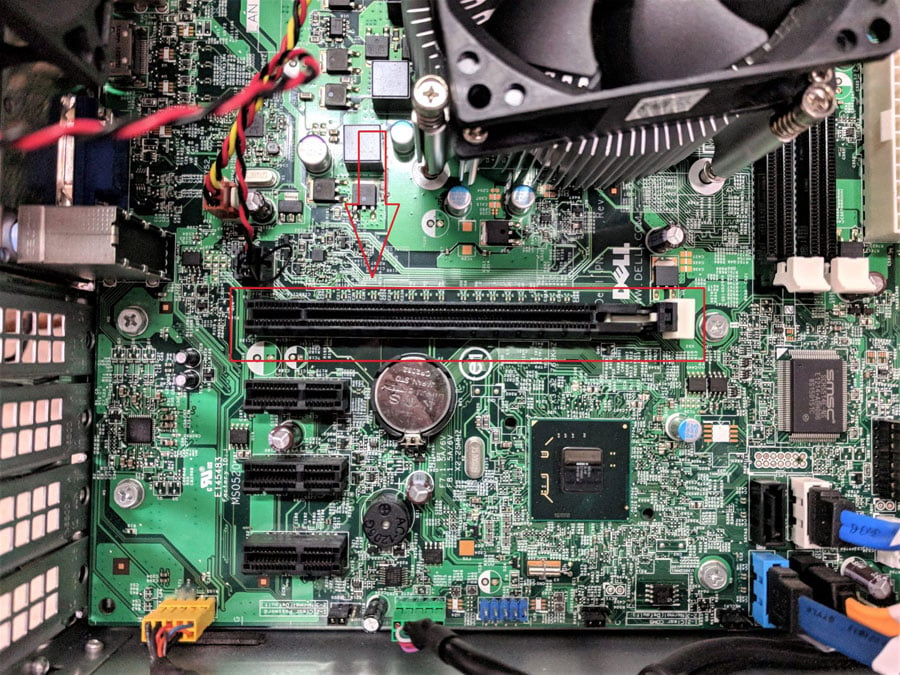
That said, here are what you need:
- An NVMe solid-state drive: Get a drive of a significantly larger capacity than the total data on the SATA drive. For example, if you’re using a 1TB SATA drive that’s 30 percent full, a 500GB NVMe drive (or larger) will do.
- An NVMe PCIe adapter, only if your computer doesn’t have an NVMe M.2 slot.
- Drive cloning software. I recommend the free version of Macrium Reflect.
Windows in-place NVMe SSD Upgrade: Steps by steps
- Make sure your computer is turned off. Assemble the NVMe drive onto your computer using the M.2 slot or the PCIe slot (via an adapter). Then turn it on. It will boot into the SATA drive as it did before.
- Install Macrium Reflect (or any drive cloning software that you’re comfortable with).
- If you’re using Windows 10, skip to step #4. For older Windows, download and install the NVMe driver software for your SSD. After the installation, restart your computer.
- Run the drive cloning software and clone the existing SATA drive to the NVMe drive. (For details on cloning using Macrium Reflect, check out this post.) When you’re at it, note if your current SATA drive uses an MBR or GPT partition for later troubleshooting. Once the cloning process is complete, turn your computer off.
- Remove your SATA drive and mission accomplished! If you want to keep the SATA drive in your computer as a secondary drive, continue to step #6.
- Change the boot order of your computer to boot from the NVMe drive first. You can do this by going to the Boot section of your computer BIOS. You can get to the BIOS by tapping on the F2 or Delete key on the keyboard right after pressing on the power button to turn the machine on most computers. Or check with the user manual.
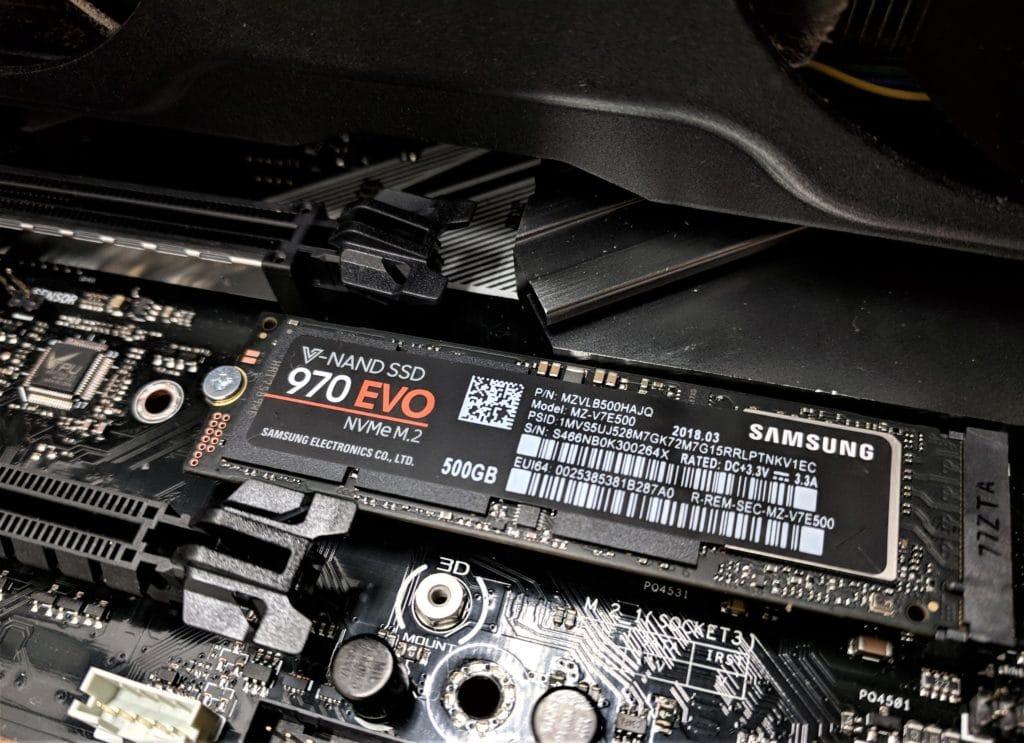
And that’s it! Now, you’ll notice a significant performance improvement, even if your old SATA drive is an SSD. In my case, the machine now booted up in about 5 seconds, down from almost 20 seconds.
Alternatively, you can also install a newly cloned NVMe SSD into another computer. In this case, make sure the new one uses the same boot method—BIOS or UEFI—as the old one. In this case, you’ll likely need to re-activate the software (Windows, Office, etc.).
NVMe SSD upgrade: Troubleshooting
I didn’t run into any issues, but here are the common few and how to fix them.
- The computer keeps booting into the old SATA drive: Make sure you change the boot order to make the NVMe SSD the first boot drive. Or remove the old SATA drive if you don’t want to bother with the BIOS.
- The computer won’t boot successfully, showing boot error like “Boot drive not found” or a blue screen. Two scenarios here:
MBR vs. GPT partition types
Whichever partition type your old SATA drive uses, the new NVMe drive will use that, too. That said, make sure you set the boot type in BIOS accordingly, as follows:
- If the MBR partition type is in use -> Make sure the computer use the Legacy boot method
- If the GPT partition type is in use -> Set the machine to use the UEFI boot method.
The computer will run into an error if it boots with an MBR drive using UEFI and vice versa.
Missing NVMe driver
The driver issue only applies to a computer running Windows 8.1 or earlier, and you might have forgotten to restart your computer in step #3 above. In this case, you’ll need to do the upgrade again from the beginning.
There you have it! If you have more issues or questions, let me know in the comment section below.
The takeaway
Generally, with a computer that uses a UEFI motherboard, which is the case of most computers made in the past decade, upgrading it from a SATA drive to an NVMe is straightforward. For a computer with the legacy boot, you might need to do some tweaks. It’s best to convert it to UEFI first if that’s possible.



If you upgrade from a SATA SSD storage (like the HP Spectre X360 13-4101dx) to an NVME SSD, just doing the SSD cloning will not work since the new SSD doesn’t have the driver installed and the PC will not reboot from it until it has it. In order to achieve that, after you replaced the SSD with the new nVME cloned, YOU HAVE TO REBOOT IN SAFE MODE. Once that’s done, since Windows 10 has already the driver, it will install it you for you so you just revert to normal mode and you are done.
That might seem a simple task but Microsoft made sure we go through hell to accomplish that since they made almost impossible to go to safe mode in windows 10, F8 key doesn’t work anymore. Not only that, but even in troubleshoot / advanced options they removed the Startup Options where you could launch the SAFE MODE. Here is the way I managed to do it.
Step1 – Make a Clean Windows 10 installation media USB thumb drive and boot from it (at least 8GB thumb drive and free to download from Microsoft)
Step2 – Click next on first window and on the second one DO NOT click on Install Windows instead click on Repair your computer (bottom left corner)
Step 3 – Click on Troubleshoot / Command Prompt
Step 4 – Remove the Clean Install USB thumb drive
Step 5 – In Command Prompt, type the “bcdedit /set {default} safeboot minimal” command and press Enter to execute it. When the operation has been completed successfully, exit Command Prompt and restart your computer, which will start in Safe Mode. Not needed for Windows 10 but If you want to enable Safe Mode with Networking to get the driver from Internet, type “bcdedit /set {default} safeboot network.
To revert to normal mode select the keyboard shortcut Win+R,, type msconfig and press the ENTER key. Click the Boot tab and uncheck the box before Safe boot, click on Apply and OK and restart your computer.
Done!
Thanks for the input, Sorin. For your case, though, just let the computer crash three consecutive times, and it will automatically offer the option to boot into safe mode on the forth. Do that, wait for it to boot fully in safe mode; now restart the computer, and it will work normally.
I have an HP Envy desktop Core I7 cpu running Windows 11 (unsupported but doing fine thanks to your upgrade from Win 10 to Win 11 post). It has a 2 TB Segate HDD and a 16 GB Intel Optane card. I would like to upgrade to an SSD main storage and leave the HDD as secondary, but I don’t know whether the Optane feature will permit this. I’d appreciate any insight you might have to such a setup.
Here’s the general direction, Tom: Clone the existing HDD onto an SSD, swap the two — boot up just like that to make sure things are good as they should be. After that, install the HDD as a secondary drive, and you can do whichever you do with it.
Wednesday, June 23, 2021 04:56 PM [Pacific Daylight Time] – Regarding Samsung NVME driver vs. Windows drive– (1) Is Samsung NVME much faster or only slightly faster (2) what type of information does Samsung harvest when using their driver — limited to configuration and performance of the SSD or personally identifiable information and files on the SSD
You need to contact Samsung on the matter, Peter, or just use Windows’ built-in driver.
I have a 2013 Gigabyte X79 (PCIe 3) main board which generally runs very well so I’m wondering if I can improve its operation. I’m currently booting and running (W10-Pro) off a SATA SSD, so to be able to boot and run off an NVMe drive would speed up some processes. Although, like you suggest, I could get a PCIe Riser card and an NVMe card to be able to run a “drive” off of that, I’ve been told by Gigabyte, and have read elsewhere that, short of a BIOS/UEFI hack, I would not be able to boot off that NVMe drive. So, 1) is there any real way around that or 2) could I boot of the SSD, then use something like boot-manager to reboot/redirect to an operating system on the NVMe riser drive?
Yes, an NVMe will improve the performance noticeably. First, you want to make sure you’re using UEFI (and NOT BIOS) boot for your SATA drive. (You can convert from the latter to the former via the MBR2GPT /convert /AllowFullOS command). More here.
Dear Mr Dong, Greetings from Shah Alam, Malaysia. Your website is great place for guidance and information for people like me who are basic budding computer enthusiast. Keep up the great work. your website does help with my computer.
One question.
My desktop is already installed with one M2. NVEME drive of 128GB as the primary drive.
Tried installing an additional 512GB into the available PCI3 slot . But the system could not recognize it at all. although system says the M2. NVEME card is working properly under the USB C mode but cant be accessed. How can I configure its usage. Appreciate your kind advice if possible
Hi Palaraja. That’s likely because the second M.2 slot (or the PCIe M.2 adapter) on the motherboard is NOT an NVMe slot but an SATA. For more check out this post.
I’m having a similar (but worse) issue.
I have a 2015 Samsung Ativ Book 9 (NP940X5J-K02US) I’m trying to upgrade. I can see the new Samsung 970 Evo SSD drive when it’s connected via USB, AND have been able to successfully clone my hard drive, but the new 970 Evo drive won’t boot when plugged into the M.2 slot, and when I try to boot from a USB media drive I can’t see the new drive in BIOS.
Is it possible an older M.2 slot only supports SATA, and will not support NVMe?
Yes, you need to make sure the M.2 is an NVMe and not a SATA one. More in this post.
I read that article – it seemed a bit inconclusive on the topic at hand.
If anything, it’s an M-key M.2 port, which seemed to suggest it should support NVMe.
I’m looking at the BIOS now and it says “SATA port 1” is not installed (where it IS installed).
I guess my confusion is that I can see it, read, and write to it connected to USB.
Does the fact that the BIOS calls it “SATA Port 1” mean it is NOT M.2? Or is that just a generic term?
USB has nothing to do with NVMe support, Josh. It’s completely irrelevant. What you saw there in the BIOS is also irrelevant. Check with the vendor to make sure the machine is NVMe-ready. My take is it’s not. My advice: Don’t assume that you know, but that you don’t. 🙂
Does this work with laptops?
Yes, Ricardo, as long as the laptop has an NVMe M.2 slot.
how do I do this if I want to move from an existing nvme drive to a larger one?
TIA
It easy. You use Macrium Reflect to make a backup of the current drive to another internal drive (or an USB portable drive). Then make a USB bootable recover disk (you need a small thumb drive). Now replace the existing NVMe drive with the larger one. Boot the computer using the USB thumb drive and restore the system from the backup.
Samsung Migration software works fine for cloning and WD Blue is ghetto, just saying 🙂